
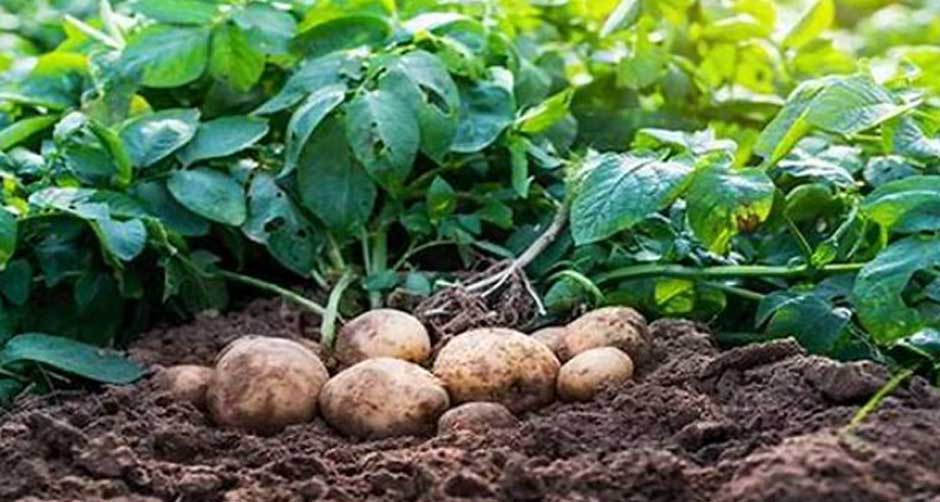
How To Grow Organic Potatoes: Tips For A Bountiful Harvest
From French fries to creamy aligot, potatoes are an important root crop to have on dining tables everywhere. In fact, potatoes are just shy of the three most important staple foods in the world (corn, rice, and wheat, in that order). Being a rich source of various nutrients and able to thrive in different environments, they’re worth growing for yourself.
Picking up some at your local supermarket is certainly an option. But when you want to be sure that your potatoes aren’t GMO and are grown without industrial pesticides, growing them yourself is the way to go. Consider these tips for cultivating delicious spuds from the comforts of your home garden.
Picking Up Seeds
As with any produce, great potatoes come from two things: quality seeds and enough TLC. As such, growing organic potatoes at home should begin with organic seed potatoes. The seed potatoes are sold by the pound and should be double-certified.
“Double-certified” is an important distinction, as it confirms that the seed potatoes are organic and meet quality standards. As the term implies, the certification is done by at least two USDA-accredited certifying agencies. They can either be government agencies or nonprofits like California Certified Organic Farmers (CCOF).
With dozens of varieties, some of which aren’t the standard brown or yellow, choosing one is arguably the hardest part. Without getting in too deep, potato varieties exist somewhere in the starchy-waxy scale, as seen below.
| Starchy Balanced Waxy | ||||
| Russet | Purple | White | Yellow | Red |
| Oblong or flat oval-shaped, floury texture with an earthy flavor | Oblong shape or fingerling, moist and firm texture with a nutty flavor | Round or long shape, slightly creamy and dense with a mild sweetness | Marble or long shape, slightly waxy texture with a buttery taste | Slightly oblong or round shape, creamy, moist texture with mild sweetness |
Each variety is ideal for a certain dish or cooking method. Starchy potatoes are great for making mashed or baked potatoes because of their fluffy texture, whereas waxy ones are suitable for salads and soups that require potatoes to maintain their shape. Think about what you want to make with the potatoes in selecting your variety.
Once you’ve picked your potatoes, the next step is to prepare them for planting. Cut the seed potatoes so that each piece has at least one or two eyes or sprouts, which will later grow into tubers. This maximizes the yield, even in the smallest plot of land.
Prepping The Soil
According to the Old Farmer’s Almanac, the ideal time to plant potatoes is between two and four weeks before the frost date. While no exact date can be derived, you’d want the average soil temperature to be 55 to 80°F at daytime and 45 to 65°F at night consistently. Consider keeping close tabs on weather forecasts in the weeks following the frost.
Potato plants survive and thrive on any soil that effectively drains excess moisture, such as sandy or loose loam soil. Soil that’s too wet risks rotting the potatoes and their tubers with prolonged exposure. Additionally, the plants grow best in moderately acidic soil, between pH 4.8 to 5.5. Any more basic and they might become vulnerable to scab.
For heavy clay soil or any soil that can’t drain effectively, a raised bed is a viable alternative. A typical mix for one includes three parts compost, one part soil, and a dash of perlite or sand.
Potatoes are heavy on nutrient intake, so the soil needs to be fertilized beforehand. If using organic fertilizer, paying attention to its nitrogen-phosphorous-potassium (NPK) proportion is key. Too much of one nutrient will produce poor results.
- Excess Nitrogen: Increases top growth but at the cost of a reduced potato yield
- Excess Phosphorous: Reduces intake of other essential nutrients such as zinc
- Excess Potassium: Lowers the tubers’ specific gravity, affecting the texture
The ideal NPK ratio for growing potatoes is a bit of a mystery. Some growers prefer a ratio with less nitrogen and more of the other nutrients, while others argue for equal parts of all three macronutrients. Considering the need to maximize potato yield in a limited growing space (i.e., your garden), an NPK of 1-2-2 (e.g., 5-10-10) won’t let you down.
If you prefer compost, pay attention to the addition of manure to the mix, namely steer and chicken manure. While rich in NPK and other key nutrients, they might harbor bacteria like E. coli that can endanger the plants. In addition, the NPK in raw manure might be grossly imbalanced, warranting composting it beforehand to lower excess concentrations.
Start tilling the soil to a depth of up to 12 inches and add three to four inches of compost or organic fertilizer. A good amount is five pounds per 100 square feet of potato-growing land.
Planting And Watering
The fruits (or, in this case, root crops) of your labor grow downward, so they’ll need plenty of vertical clearance. Between the right soil conditions and consistent watering and care, one seed potato can yield as many as ten potatoes. The actual number still depends on a slew of factors such as the variety.
Experts at Michigan State University’s Potato Breeding and Genetics Program recommend planting seed pieces 3 to 4 inches deep and 9 to 12 inches apart, with rows spaced 30 to 36 inches apart. These figures apply to medium-sized potatoes, though other varieties like Yukon Gold may develop hollow hearts when there’s too much spacing.
Potatoes may not like excess moisture in their soil, but they need water nonetheless. One to two inches of water a week is enough to meet their water needs. More importantly, you want to be consistent about watering them. Otherwise, the spuds may form into irregular, if not unsightly, shapes.
In warmer climates, blanketing the soil with mulch can prevent significant moisture loss through evaporation. Organic mulch can consist of newspaper, straw, or grass clippings. Apply at least four inches of mulch on the soil surface.
Once the potato plant grows to six inches in height, some of the tubers and spuds may surface. Prolonged exposure to sunlight isn’t good for them, as it can cause green skin. The discoloration may just be the chlorophyll, but it’s also a sign of a high concentration of solanine, a compound that can upset your stomach in high enough amounts.
To reduce this risk, growers turn to a process known as hilling. It involves creating a mound of soil or mulch 3 to 6 inches high and 12 to 15 inches wide from the plant base. This way, the tubers and spuds can remain thriving safely in the dark.
Solanine is also present in potato berries, which are the fruits produced by some varieties. Unless you plan on pursuing potato breeding, you probably won’t have much use for them. If you have children who may wander into the potato patch and mistake potato berries as tasty fruit, removing and throwing them away makes sense.
Pest Control
Insecticides and organic farming don’t exactly go together. It can be hard to justify growing organic crops when protecting them from swarms of pests involves synthetic chemicals. It also doesn’t help that the chemicals can trickle into the crops and soil, which get passed on to people and the environment.
The good news is that there are several eco-friendly pest control options available, some of which you can make yourself. For starters, mulch also serves as a deterrent for most pests like the Colorado potato beetle and potato tuber moth. Here are other options.
Crop Rotation
Planting potatoes may as well just be the beginning. Growing other produce on the same plot of land works to your advantage thanks to crop rotation. A different plant growing in the same plot that grew potatoes last year will interfere with the life cycle of pests that expect to feed on the latter.
After potatoes, consider growing beans or onions the following year and brassicas the year after that. If you want to maintain a steady supply of homegrown potatoes, prepare multiple growing patches. These patches also warrant crop rotation.
Attracting Pest Predators
Ladybugs and flower fly larvae are the natural predators of most potato pests. While they may munch on the plant’s leaves, experts say they won’t affect yield as long as their numbers are kept in check.
In lieu of the latter, attract flower flies by planting white or yellow flowers, such as alyssums and marigolds. Adult flies only feed on nectar, while their larvae go after aphids and other pests.
Neem Oil
Also known as margosa oil, neem oil is a popular biopesticide extracted from the neem tree, a species native to the Indian subcontinent. Growers often mix neem oil in a solution that also includes a bit of liquid soap or detergent. Spray the solution on the foliage twice a day, once in the morning and once at night.
However, neem oil can also be deadly to the pests’ predators. It’s advisable to go for this option when you don’t plan on keeping beneficial insects around.
It pays to visit your potato patch every day to check for pest eggs and larvae. For Colorado potato beetles, their eggs can be found on the undersides of leaves. Remove them by hand and put them in a soap solution or in a garbage bin well away from the potatoes.
Harvesting And Storage
Potatoes ripen at various timeframes, divided into early, mid, and late seasons.
- Early Season: 60 to 80 days with a shelf life of up to two weeks
- Mid-Season: 80 to 100 days with a shelf life of up to one month
- Late Season: 100 to 130 days with a shelf life of up to three months
You can tell if the potatoes are almost ready for harvesting when the leaves turn yellow and wither. At that point, it’s important to reduce their water intake. If that occurs, you can do a simple test by getting a potato and trying to rub its skin.
If the potatoes’ skin doesn’t come off easily by hand, they’re ready. Otherwise, you have the option to leave it for a few more days or use it for your recipes immediately (their thin skins won’t retain their moisture for long).
When harvesting potatoes, check for bruises or other forms of damage. Store good ones in breathable containers and in a cool environment (45 to 60°F with high relative humidity) for two to three weeks. Ensure proper ventilation in the storage space and avoid storing the potatoes in the same room as other produce like apples, lest risk spoilage.
Conclusion
Growing potatoes is hard work, much like any other crop, but rewarding in terms of saving on your grocery list. Try growing some for your mashed potato or au gratin and experience the difference of using your own spuds.